Edited by Grace Xiong, Harry Lightsey, Brendan Striano - 7/1/2021
Indications/Contraindications
Indications: Shoulder dislocation
Relative contraindication: Proximal humerus fracture-dislocations (if just the greater or lesser tuberosity is off, OK to give it a try. If the shaft is off, do not attempt as you’ll be causing traction on neurovascular structures).
Contraindication: Associated floating elbow or distal injury, scapulothoracic dissociation, anything that means you’ll be pulling traction through severely injured tissue.
Many techniques exist. Below are just a few.
Technique (Massage/Cunningham)
Materials: None
Positioning: Patient is upright in a relaxed pose. You face the patient on the side of the dislocation and take their ipsilateral arm in your arm closest to them.
Technique: Your free arm massages the patient to relax the muscles, starting at the trapezius, then deltoid, biceps, and distal. Do this a few times.
Patient relaxation is key.
The theory behind this is that relaxing the biceps decreases the tension and allows the humeral head to slide back in.

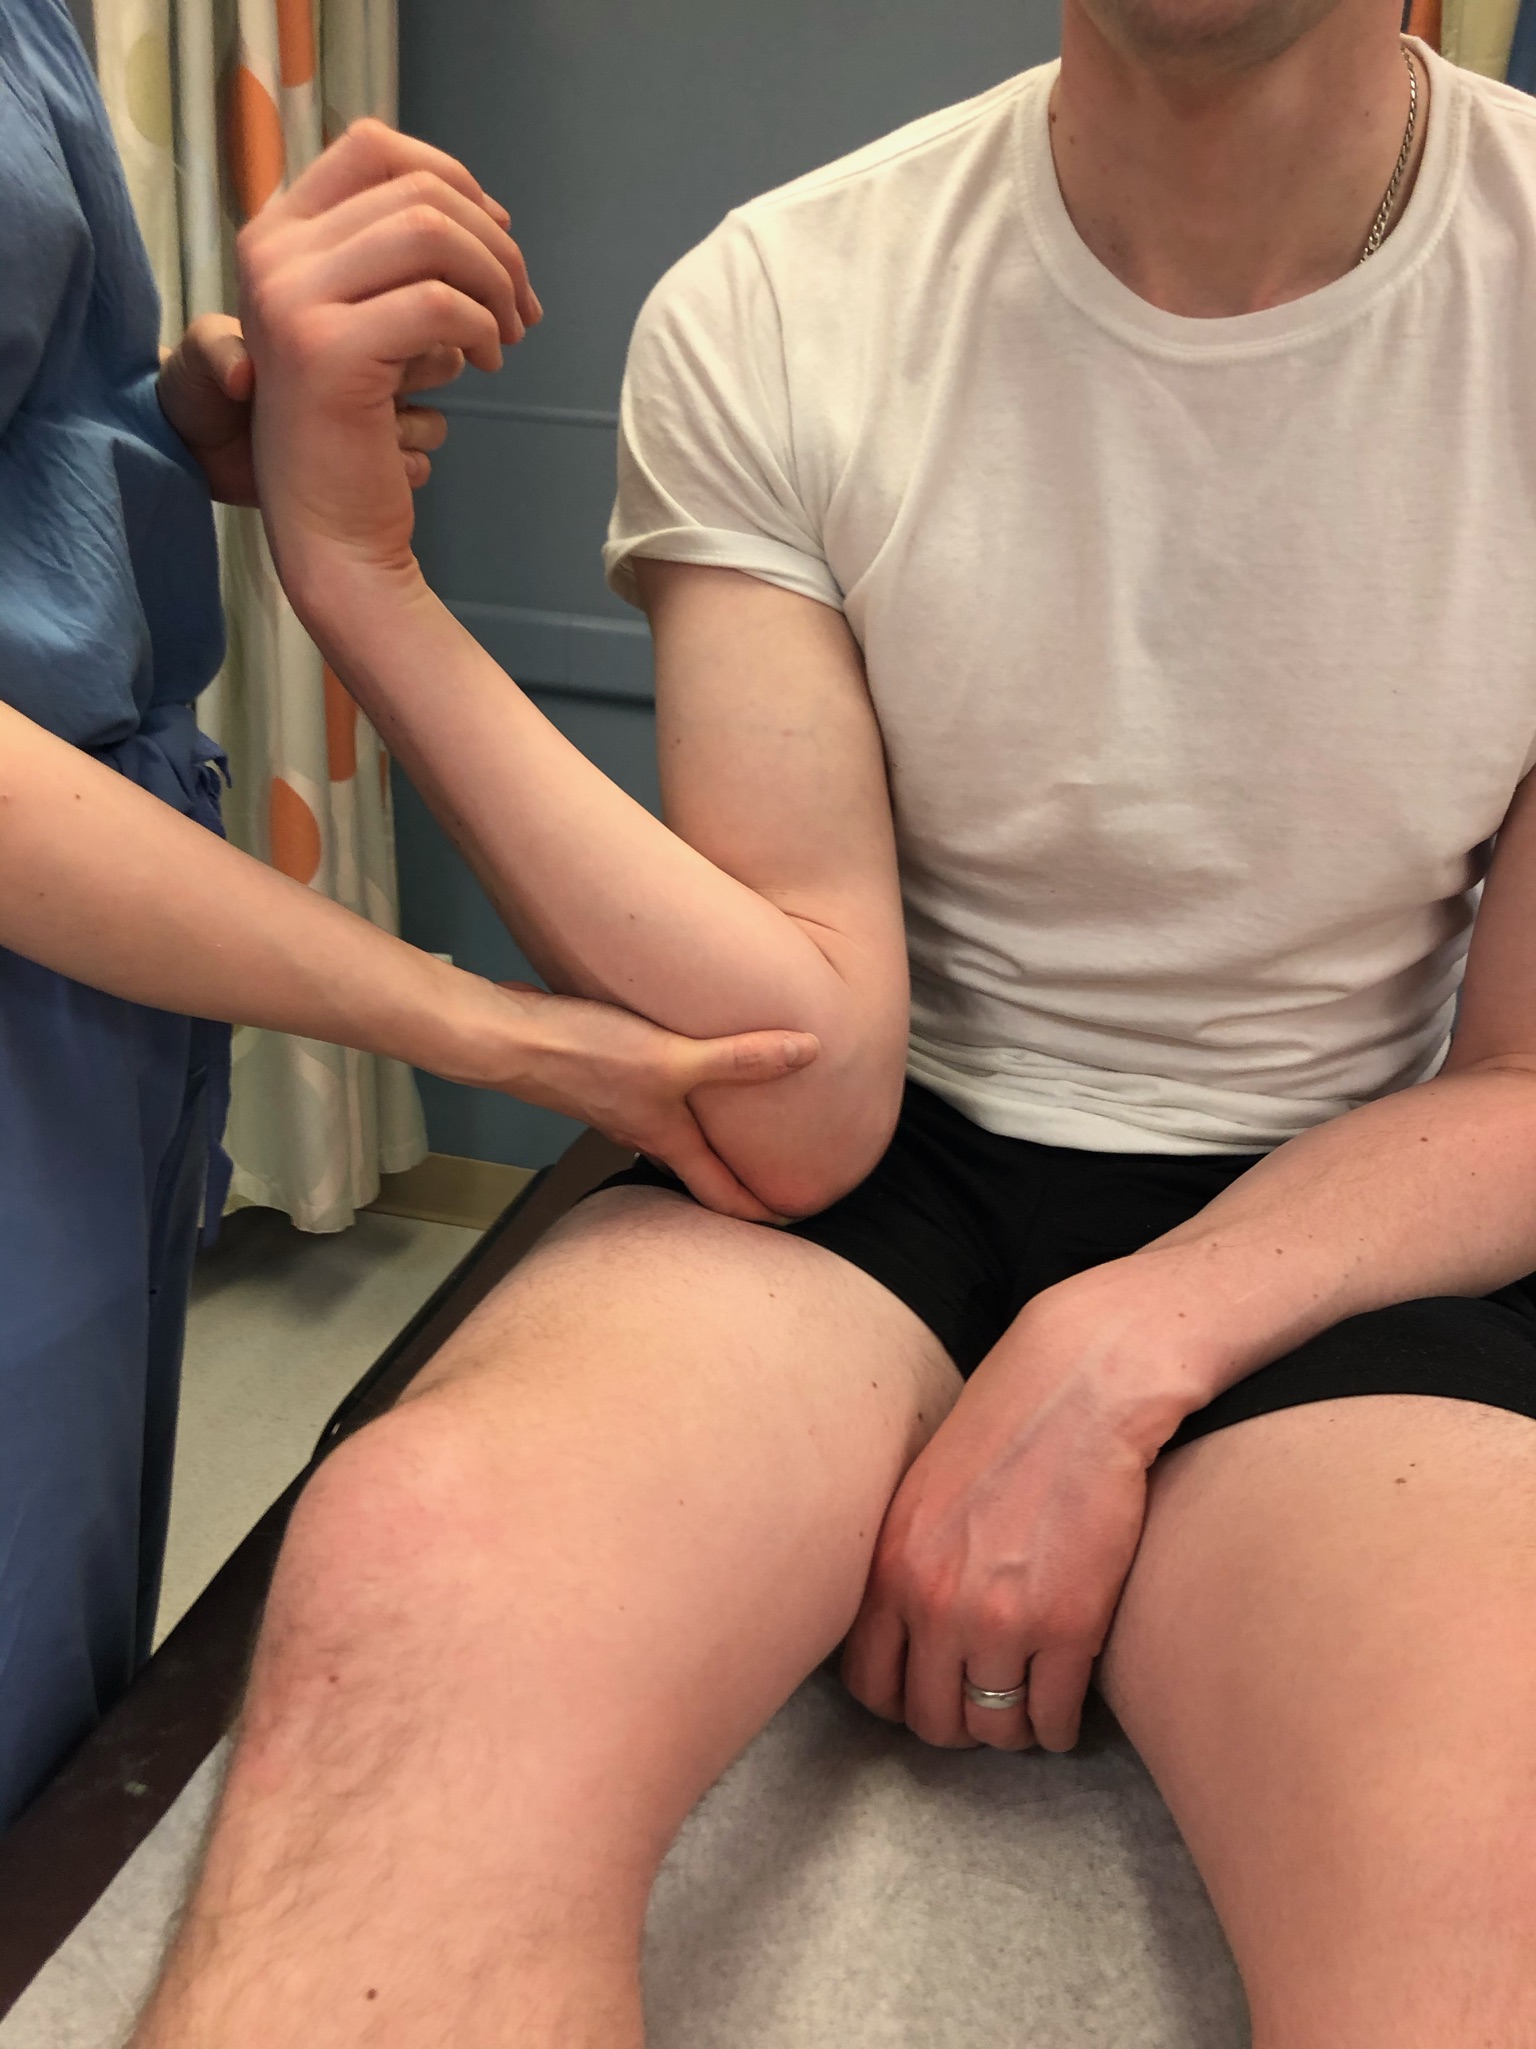
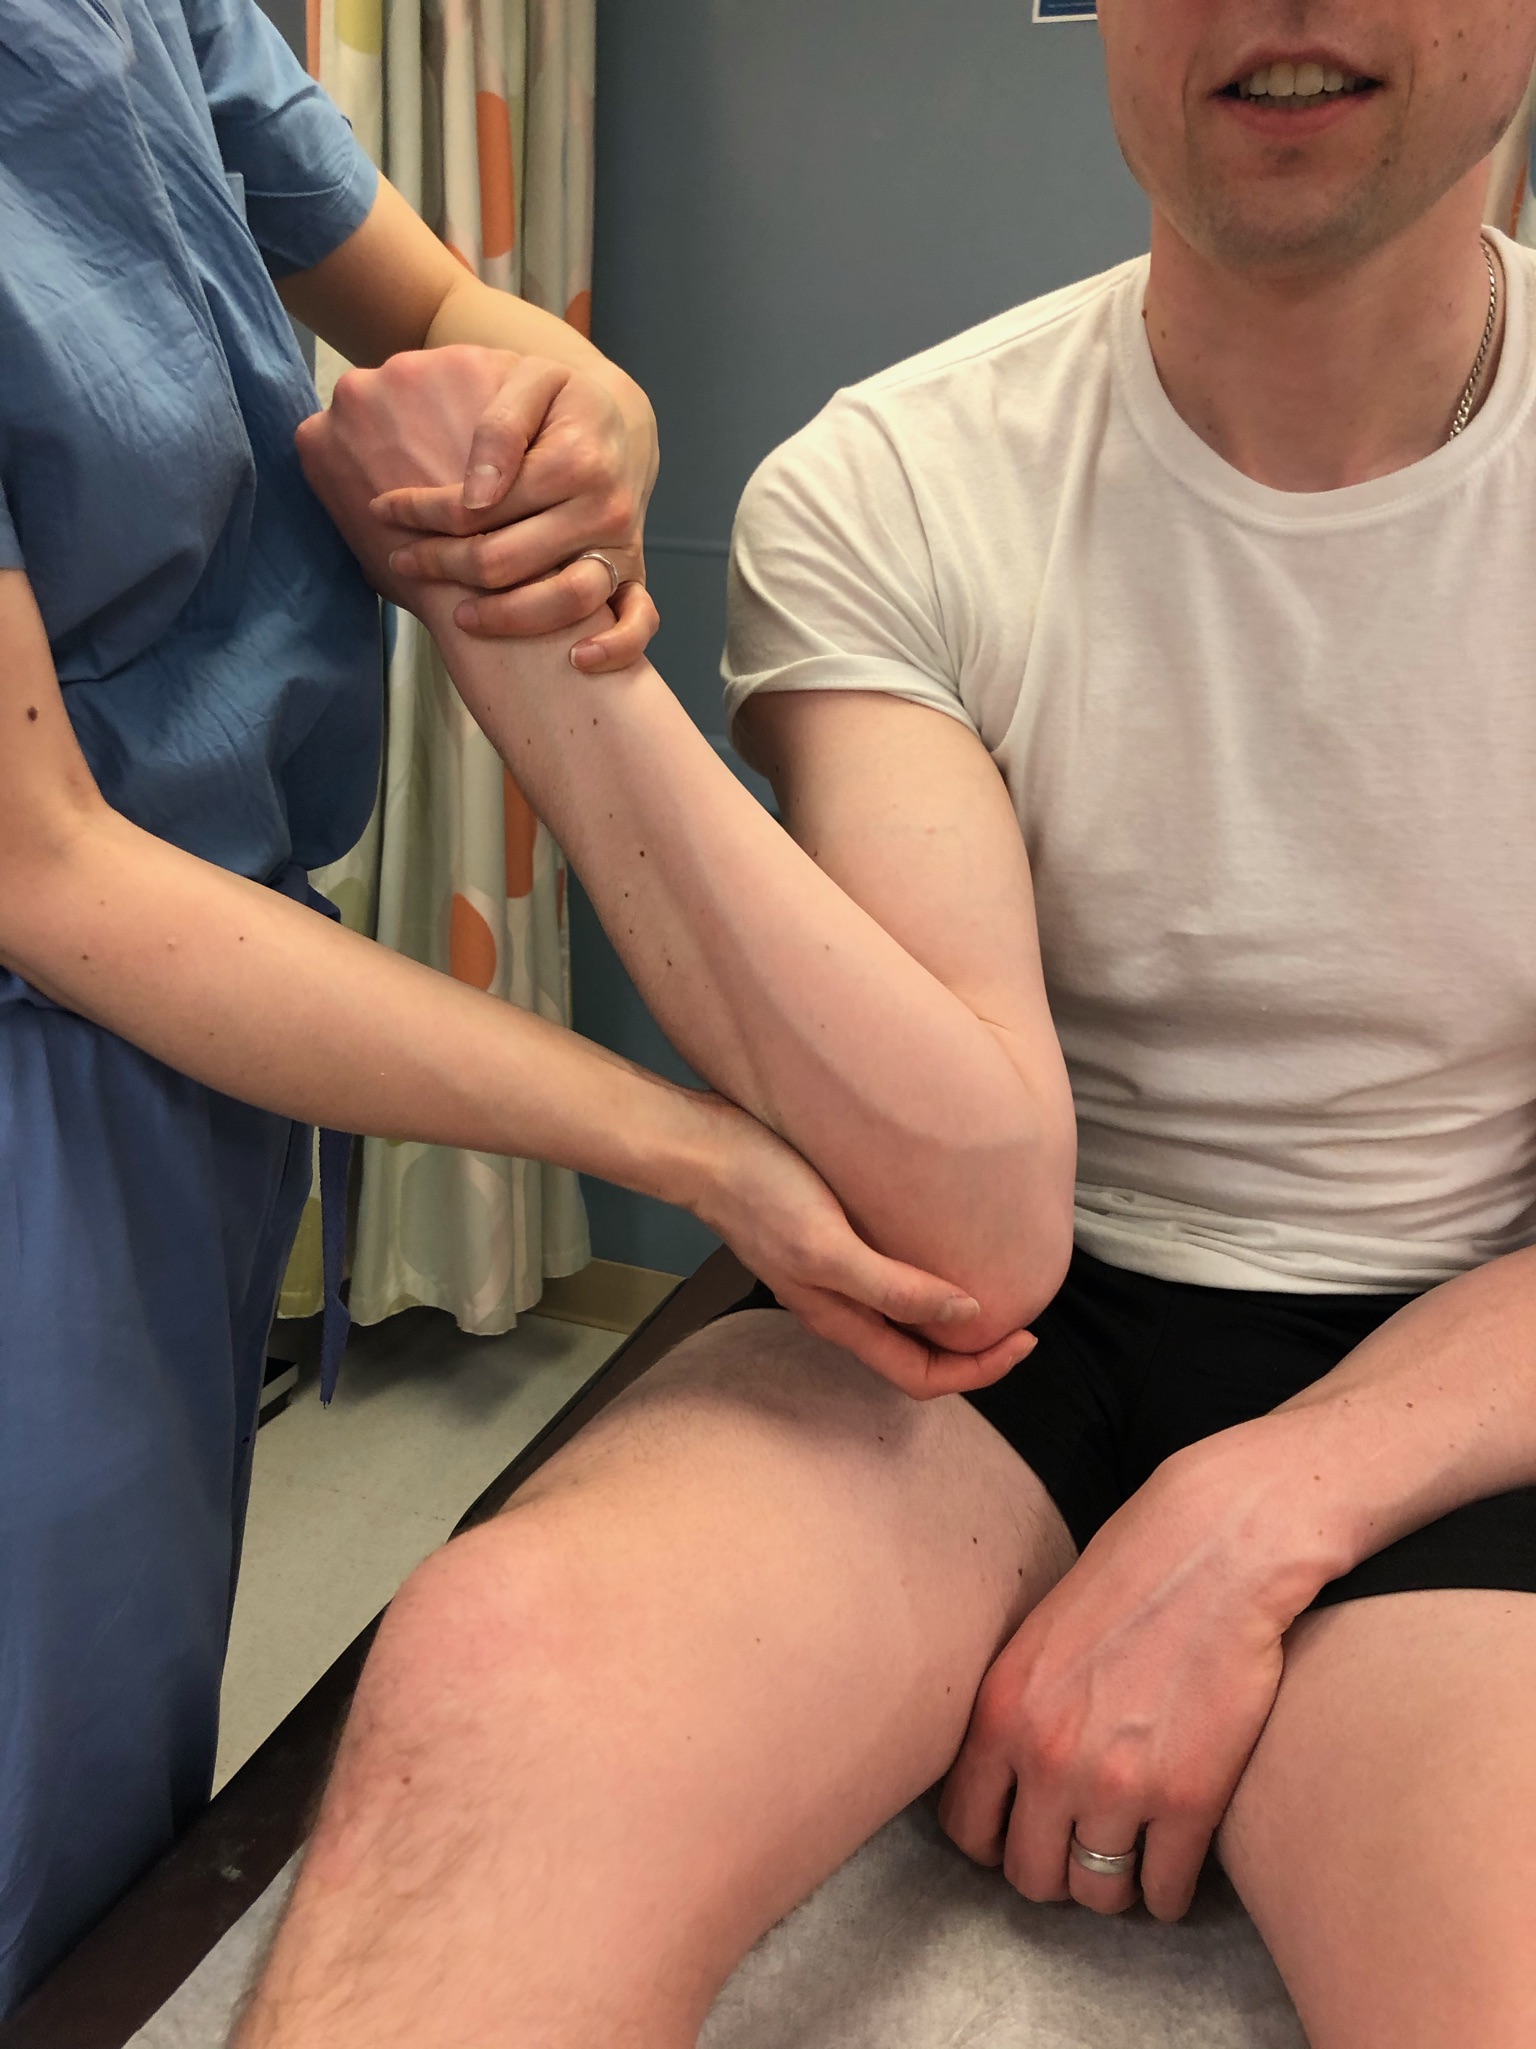
Technique (Adduction/External rotation)
Materials: None
Positioning: Supine or upright You face the patient on the ipsilateral side of injury.
Technique: Flex the elbow with your inside arm (closest to the patient) and pull some gentle traction downwards so the patient doesn’t contract their shoulder up.
With your outside arm, push the patient arm so the shoulder is adducted
Externally rotate the arm.
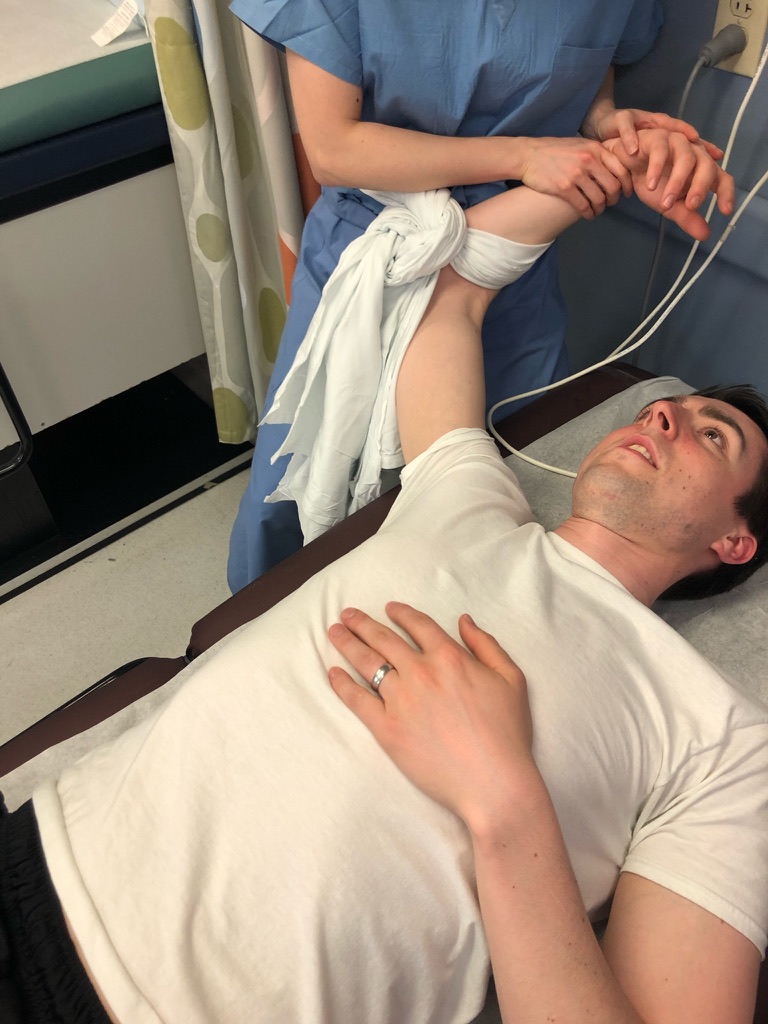
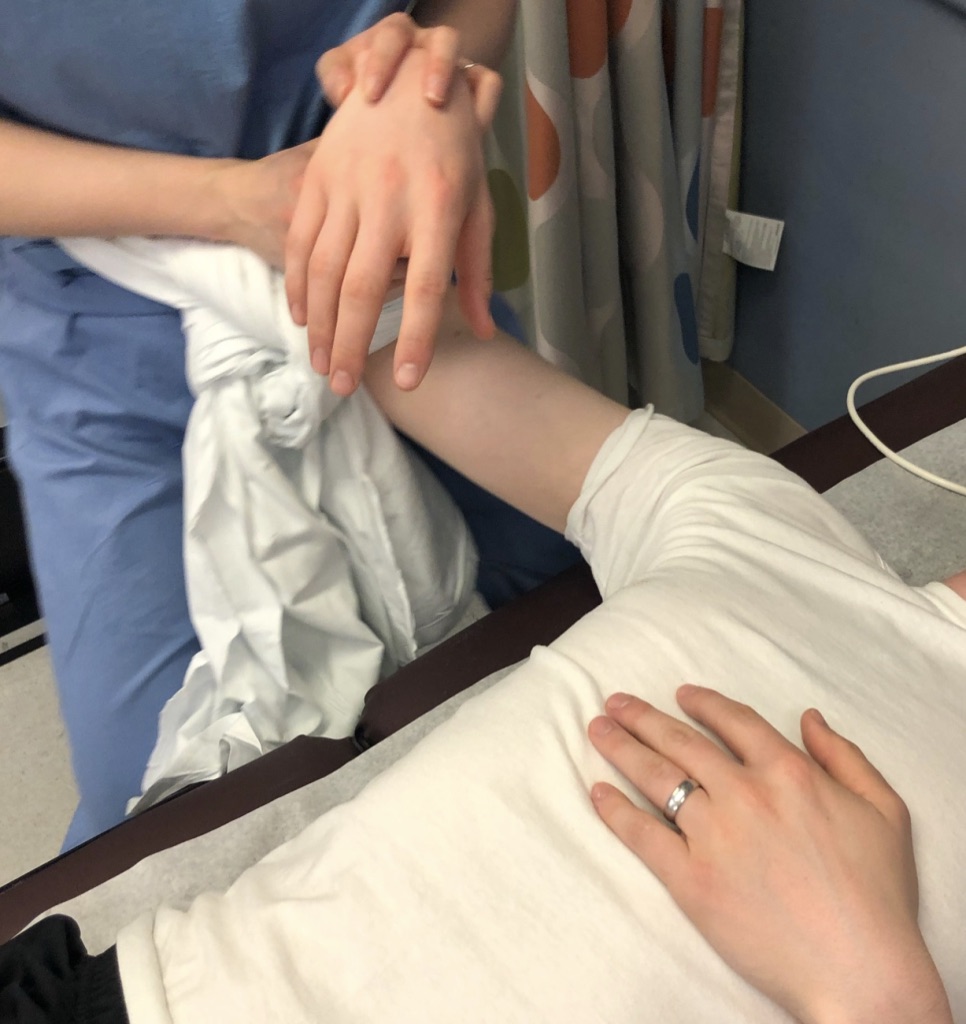
Technique (Abduction/External rotation)
Materials: Two sheets
Positioning: You may try doing gradual abduction and external rotation with the patient supine or upright with no traction first.
If this does not work, then set up for traction (technique below)
Technique: Patient supine, with one sheet wrapped under the ipsilateral axilla and going towards the contralateral shoulder for countertraction.
Hold the ipsilateral limb with the elbow flexed to 90 to give yourself the forearm to use as a lever for rotation.
You first pull the ipsilateral limb into straight traction, then gradually walk upward for abduction and external rotation.
If you find that the forearm is slipping out of your grasp, tie a sheet around your waist and loop the forearm through it to the base of the elbow to give more control and traction.
Technique (Prone traction)
Materials:
Stockinette, about 24 inches
Webril
Weights (anything - saline bags, etc - at least 5-10 pounds)
Positioning:
Prone on stretcher, with patient all the way to the side
Make sure the scapula is off the bed
ONLY do this in patients without airway issues and who are mentating well enough not to fall off the stretcher.
Technique:
Place weights into stockinette and tie at the base.
Slip stockinette onto the arm.
Wrap webril around arm to secure.
Hang for at least 10-15 minutes.
Post reduction imaging and protocols
Imaging:
Post-reduction shoulder films with three views: AP, lateral, and an axillary view - the axillary view is essential.
Immobilization: Sling for comfort
Restrictions: WBAT upper extremity, gentle pendulums
Follow up: 2 weeks ortho trauma, sports clinic, or upper extremity clinic
Pearls & Pitfalls
Potential complications: Iatrogenic fracture, neurapraxia from overly aggressive traction
Tips for efficiency:
Have all materials ready prior to starting.
Have post-reduction film ordered and portable AP on standby early or before starting.