Edited by Grace Xiong, Harry Lightsey, Brendan Striano - 7/1/2021
Indications/Contraindications/Set-Up
Indications: Posterior hip dislocation (native or periprosthetic).
*Native hip dislocation is a urgent reduction. Barring extenuating circumstances, this must take precedent over all other non-limb or life threatening consults.
Contraindications:
Ipsilateral proximal femur fracture (OK to reduce Posterior Hip Dislocation with a femoral head fracture)
Relative contraindications:
Intraprosthetic dislocation, e.g. dislocated constrained liner (look for metal ring on x-ray), dislocated intraprosthetic dual mobility head (look for shadow of poly liner on the XR, and a head that seems “too small” for the shell).
Setup and Materials
Consent: It is important to explain to the patient that this is an attempt at a reduction and that failure may mean a trip to the operating room for a repeat closed reduction versus open reduction. Additionally, explain the low, but real risk of iatrogenic fracture or nerve injury
XR Pelvis ordered prior to the sedation
Acquire immobilization (purple abduction pillow or knee immobilizer) prior to sedation so that it can be placed as soon as you finish without delay (don’t want to be scrambling once you’ve reduced a tenuous hip)
Technique (Midline traction)
Materials:
Sheet or towel
Second person to help prevent patient from falling off the bed.
Positioning:
Patient is supine and midline on stretcher.
Assistant is at the thigh on the ipsilateral side.
You are on the ipsilateral side of the dislocation at the foot.
Technique:
Adequate sedation is critical for any successful reduction. The patient should be non-communicative to significant movement of the dislocated extremity. They should not be speaking, moving, attempting to grab you or others. If this is the case, work with your sedation team to increase sedation. Reduction attempts with inadequate sedation can lead to iatrogenic fracture and further injury.
Assess leg length** prior to starting sedation as restoration of leg length may be the only indicator of reduction
Assistant places sheet or towel around the proximal thigh and pulls traction superolaterally.
You pull the foot for in-line traction and rotate the foot internal and externally.
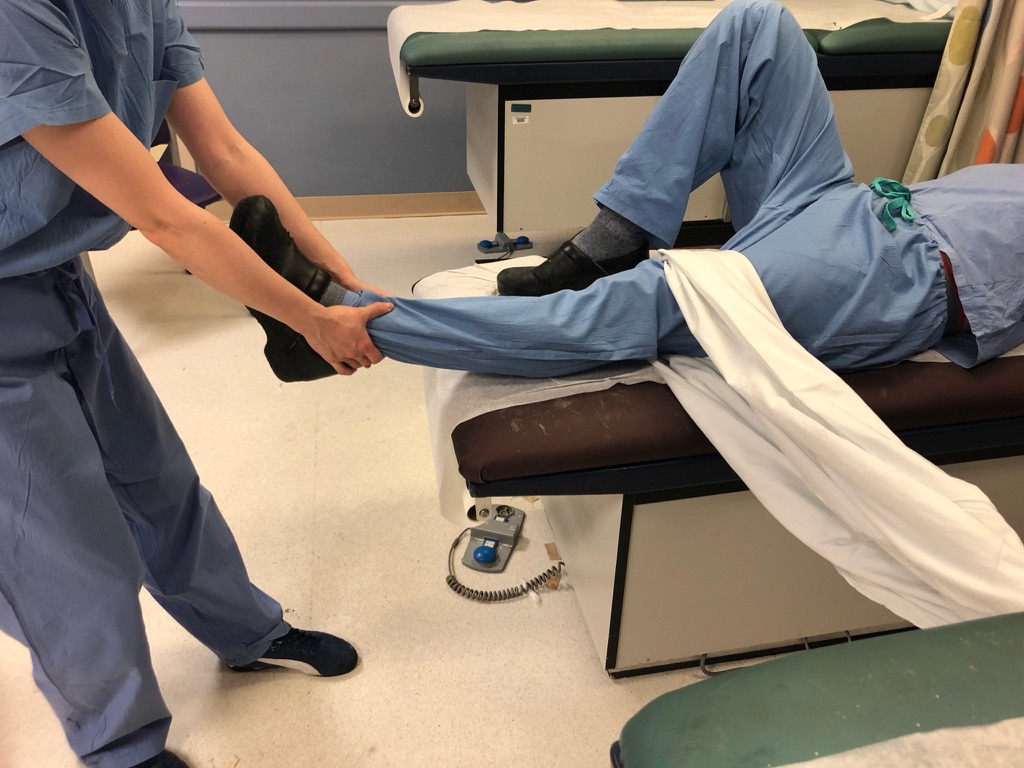
Traction should begin as the sedation is started to maximize time to tire out the tight, contracted musculature
Technique (Allis/flexion)
Materials:
Sheet or towel
Second person to give contralateral countertraction.
Positioning:
Patient is supine and midline on stretcher.
Make sure stretcher is dropped as low as possible and moved to a place in room where there is nothing overhead
Assistant is at the hip on the contralateral side.
You can supplement or replace the assistant with a sheet tied around the ASIS and the stretcher.
You are standing between the patients’ legs, positioned roughly with your feet at the level of their ASIS or higher.

Technique:
Adequate sedation is critical for any successful reduction. The patient should be non-communicative to significant movement of the dislocated extremity. They should not be speaking, moving, attempting to grab you or others. If this is the case, work with your sedation team to increase sedation. Reduction attempts with inadequate sedation can lead to iatrogenic fracture and further injury.
Assistant places both hands on the contralateral ASIS and provides downward force to prevent the pelvis from lifting off the bed.
Pull the dislocated leg into hip flexion and knee flexion, hugging the lower leg of the patient behind the knees. For most patients their foot will rest just past your crotch.
Pull WITH YOUR LEGS, not your back, for upward traction, and internal rotation followed by external rotation.
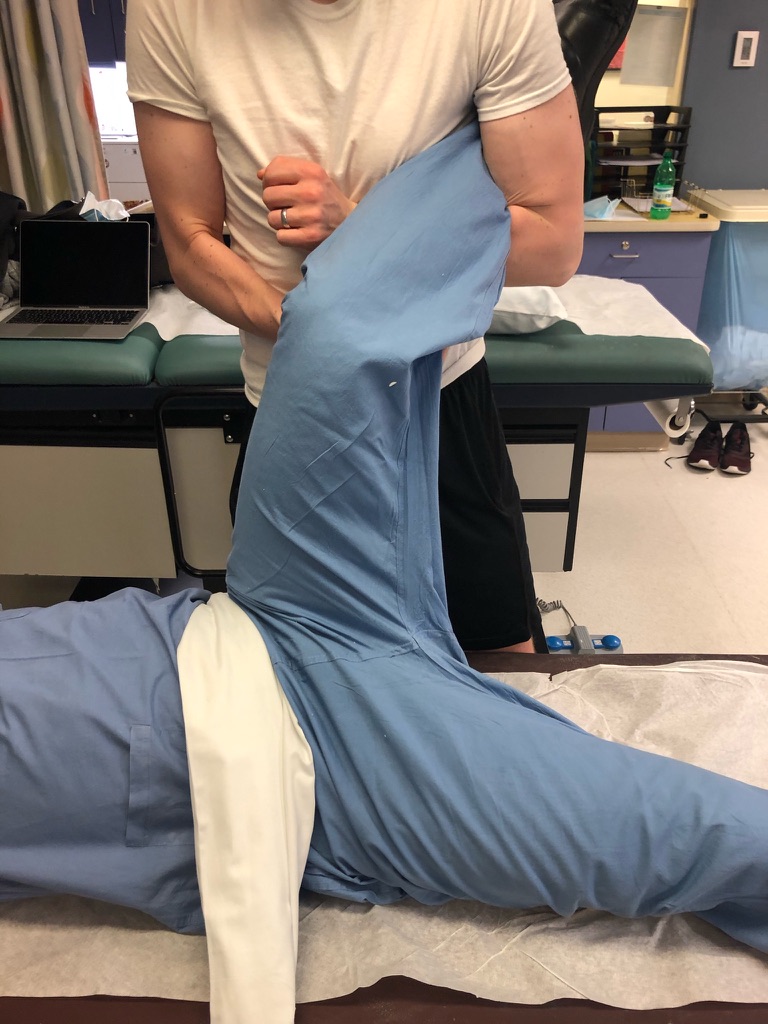
Technique (Standing/Flexion)
Materials:
Sheet or Towel
Second person to stabilize the pelvis
Positioning:
Patient is slid such that the dislocated side is at the edge of the bed
Assistant at contralateral hip
You start standing at the foot and pulling axial traction while sedation begins to tire out the hip musculature
Once patient is fully sedated -not moaning at your traction, Move to the Greater Troch of the dislocated side
Technique:
Adequate sedation as above
Start with axial, longitudinal traction on a straight leg while sedation begins both to tire out musculature and gauge level of sedation
Once at the ipsilateral hip, flex the hip to 90 degrees with the knee bent to 90 degrees
Wrap the lower leg (just below the knee)in your forearm such that you can pull axial traction up off of the bed (twd ceiling) by squatting and forcefully standing up
Use the lower leg as a lever to help internally rotate the hip
Post reduction imaging and protocols
Imaging: Post-reduction AP and cross-table lateral XR of the hip
-Once reduction completed (satisfying clunk w/ restoration of leg lengths), have someone call for STAT portable XR (should ask ED to order this before starting procedure)
-Have rad tech place lead shield on you while you hold reduction (abduction and ER)
-Shoot AP Pelvis first to gauge if hip is in. If appears located, proceed to orthogonal image
-Rad tech may resist shooting orthogonal, but you must persist because do not want to have to end sedation event to have patient go to XR suite to find out hip is not reduced because then patient would need 2nd sedation event. Shooting orthogonal in the bay is best for patient care.
Immobilization: Knee immobilizer to prevent knee flexion (which in turns prevents hip flexion or extension), abduction pillow.
Restrictions: WBAT bilateral lower extremities, no flexion past 90 degrees, no adduction and internal rotation.
Follow up: 2 weeks with original surgeon.
Pearls & Pitfalls
Potential complications:
Femur fracture can occur if the patient is inadequately sedated and fighting reduction attempts.
Injury to the person performing the sedation is a real risk - remember to push and pull traction with your legs, not your back.
Tips for efficiency:
Have the setup and materials (including sheets, assistants, braces, pillows) before sedation begins. If you are working with an untrained assistant, you must give them specific instructions (which includes things like, don’t allow the patient to fall off the bed).